First off, we need to understand that in order for the language switcher to work, we need to create a multi-language group for each of our pages.
Let's say you've created a Home page that has content in english, and you want to add an german variation. What we need to do is create a new multi-language group with a new instance of your page, with german as the new version's language. Your new german instance will have an exact copy of your original english content, and you will need to update your content to german manually.
It's important to understand that these two instances of your page live within a group language, but are independent of each other. Changes made to your German page won't be reflected on your English page.
Here's a HubSpot article on how to create multi-language groups. For now, let’s focus on the Create multi-language variations of pages and Manage pages in a multi-language group sections.
Once our multi-language groups are all set, we need to add the language switcher to our global header content to allow your users to switch between your mulit-language pages. Follow the next steps.
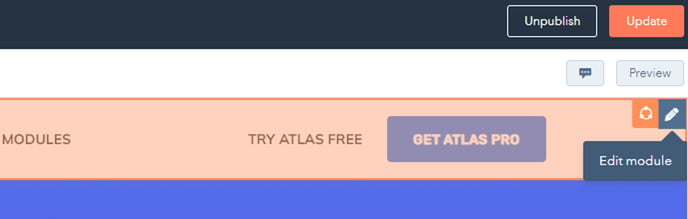
- Go to any website page editor that has the website header
- Hover over the header and click Edit module
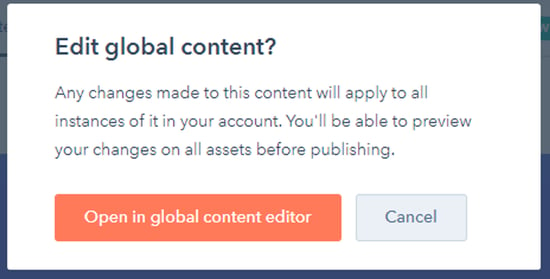
3. Note that any change to the global header will affect all website pages. Click Open in global content editor.
4. You are now editing the global header content.
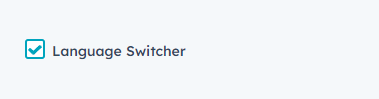
5. Check the Language Switcher box and click the Apply changes button.
6. Finally, click the Publish to x assets button at the top right of your screen.
7. You're all set! Your header will now feature a language switcher.
