This article will show you how to carry over all your assets from the Free version to the Pro version
Considerations
We have tried to make this process as easy and fast as possible. However, due to the limitations of HubspotCMS, there are some assets that cannot be migrated over from Atlas Free to Atlas Pro. These assets will need to be rebuilt and reconfigured once you install Atlas Pro.
These are the settings, configurations, and assets that will not be migrated over to Atlas Pro.
- Global Theme Settings
- Global Modules
- Simple Navbar (when used as a Global Module)
- Navbar with Menu (when used as a Global Module)
- Footer (when used as a Global Module)
- Simple Footer (when used as a Global Module)
- Global Blog Subscribe
These are the settings, configurations and assets that will be migrated over to Atlas Pro.
-
Atlas modules (including its content and configuration).
- Cards Slider
- Custom Anchor
- Custom Blog Subscribe
- Custom Rich Text
- FAQ
- Featured Cards
- Footer (when NOT used as a Global Module)
- Four Column Card Grid
- Hero Banner 01
- Hero Banner 02
- Hero Banner 03
- Logo Soup
- Navbar with Menu (when NOT used as a Global Module)
- Offer Bar 01
- Pricing Cards
- Product Features 01
- Product Features 02
- Product Features 03
- Simple Card
- Simple Footer (when NOT used as a Global Module)
- Simple Navbar (when NOT used as a Global Module)
- Social Sharing
- Testimonials
- Three Column Card Grid
- Timeline
-
Atlas templates (including its structure)
- About
- Blog listing
- Blog listing Drag and Drop
- Blog post
- Detached Landing Page template
- Home
- Landing page
- Pricing
- Product
- Resources
Step-by-step guide
1. Reconfiguring Atlas Pro's Global Settings
As we have mentioned before, these settings will need to be rebuilt/reconfigured in Atlas Pro. Before we start, please make sure that you create a new page using an Atlas Pro template. The content of this "test" page will not matter since we are only using it to access and update the global settings.
Global Theme Settings.
You can access the Global Theme Settings by clicking on the Theme tab on the left menu when editing the page.
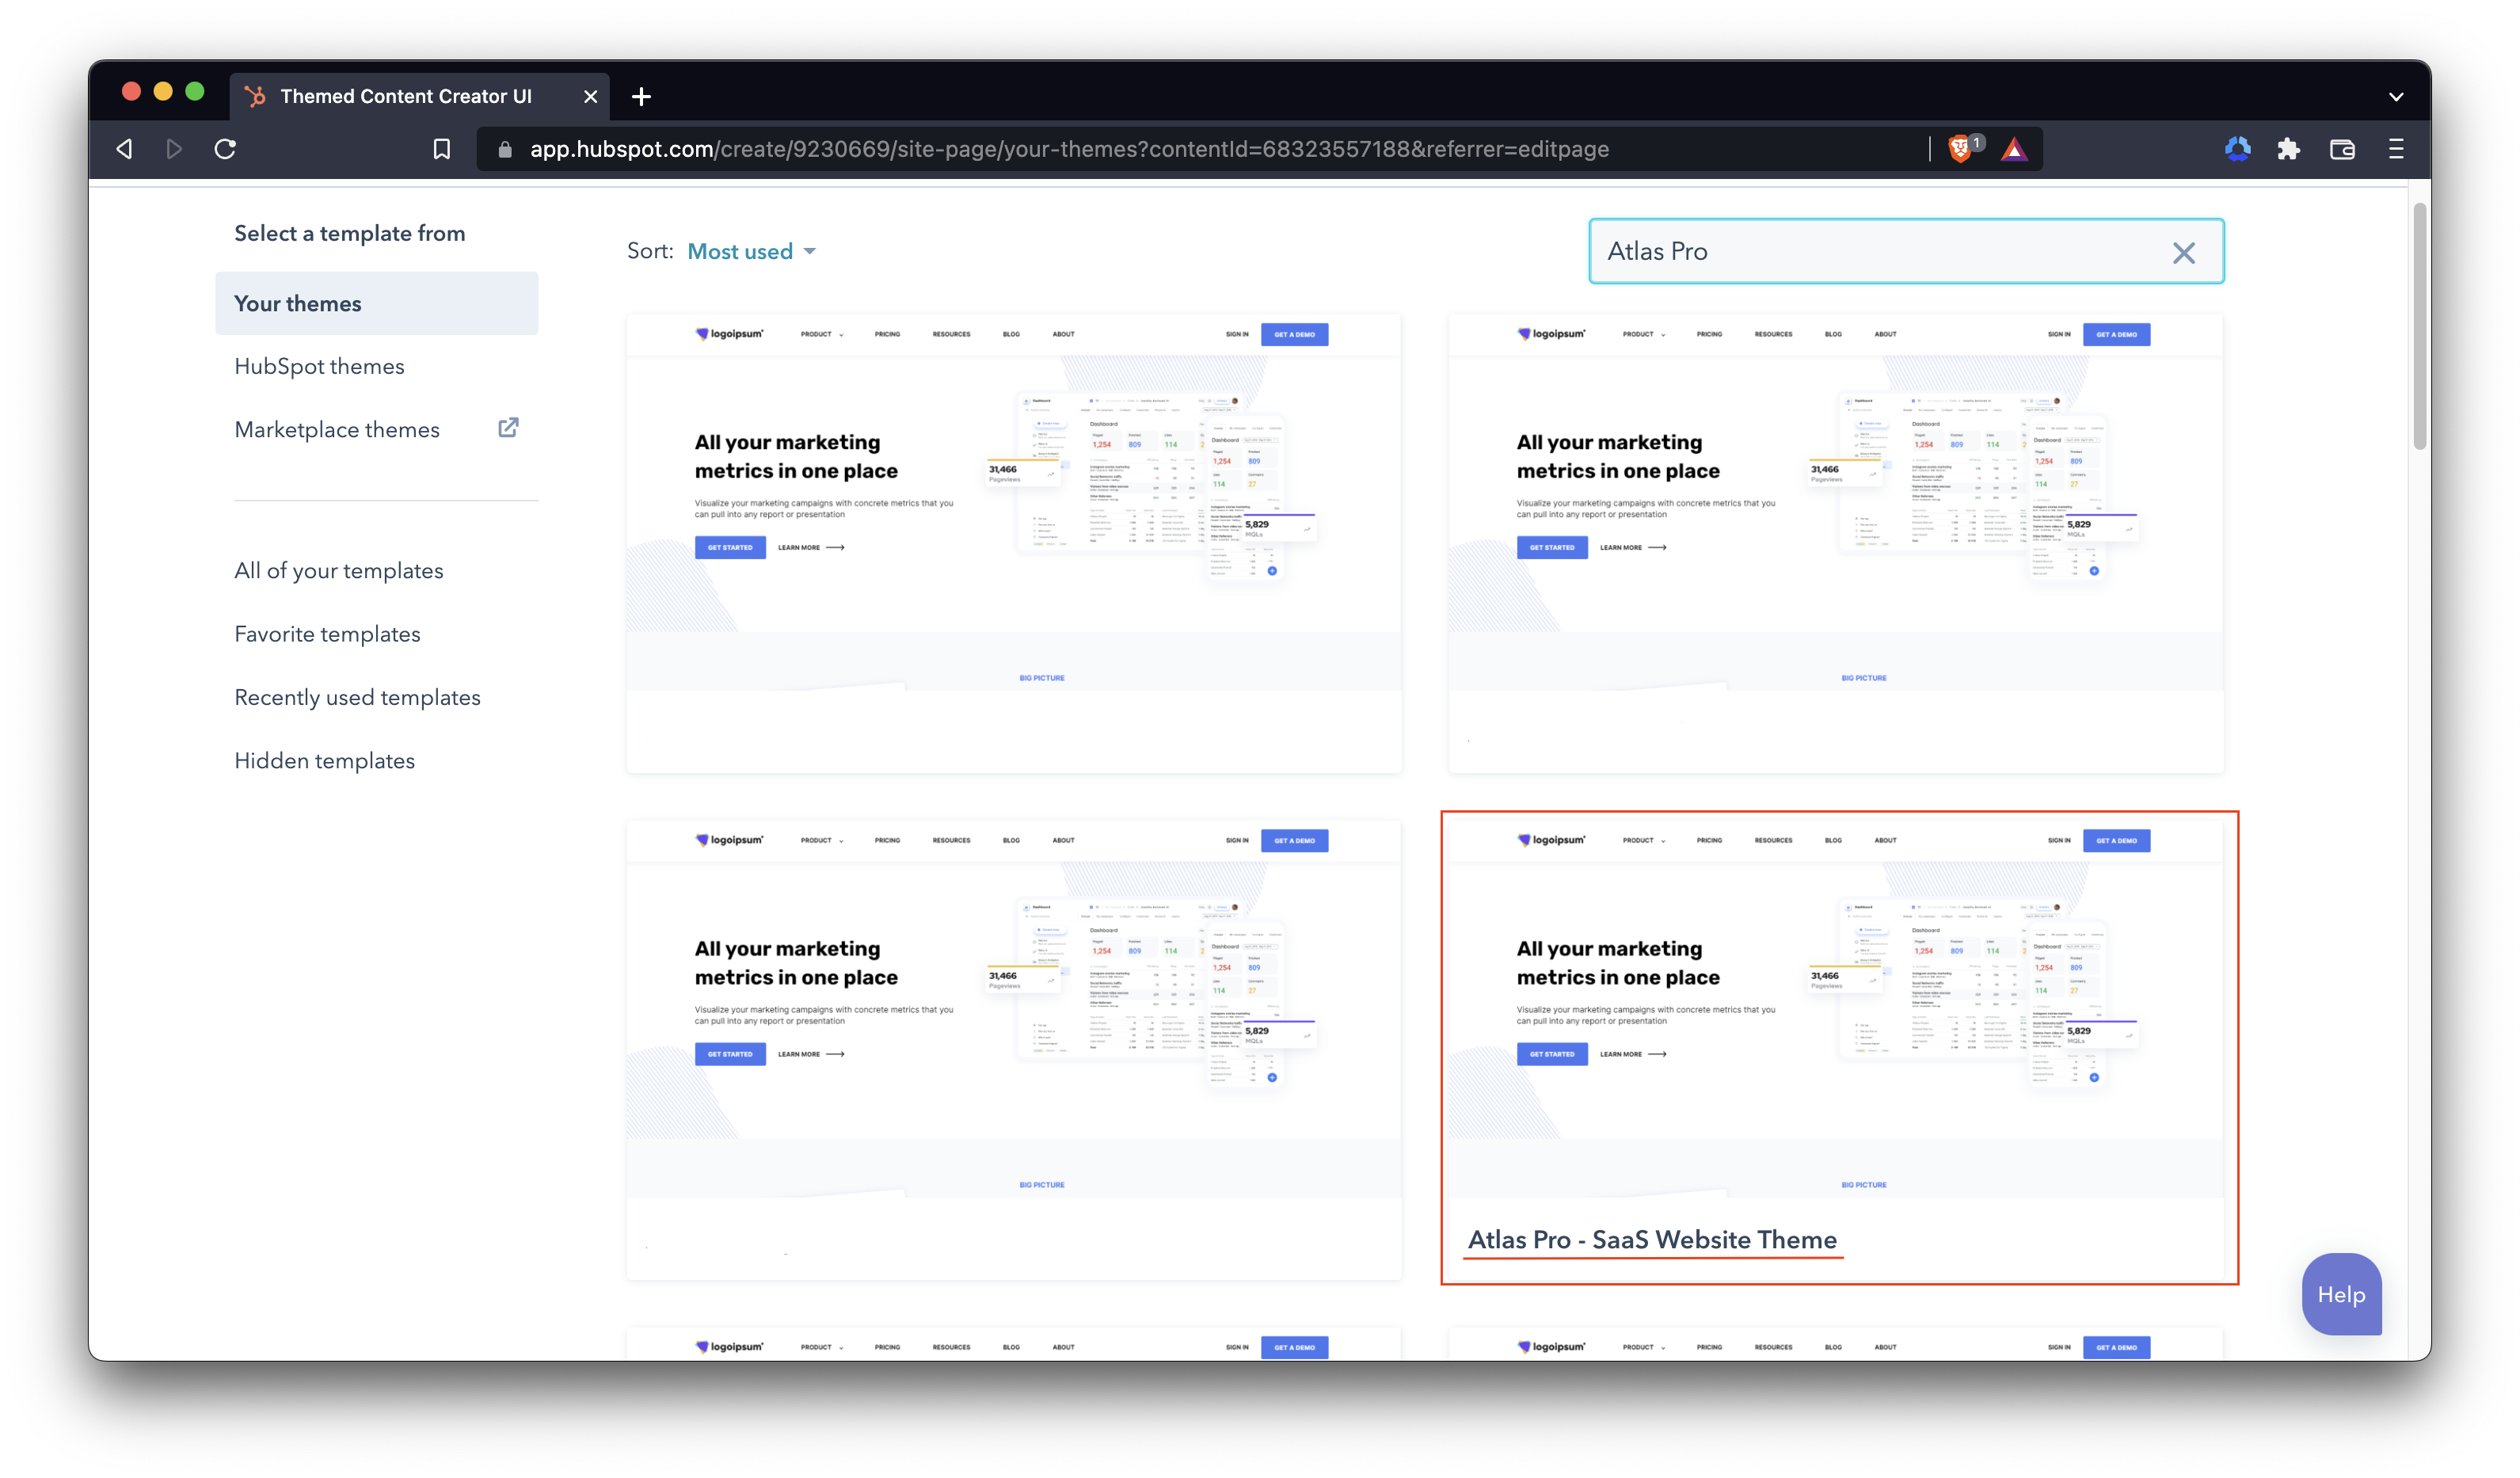
Here you can check which theme you are using. Please make sure that you are using the Atlas Pro - SaaS Website Theme theme. Click on the Edit theme settings button to access the global theme settings.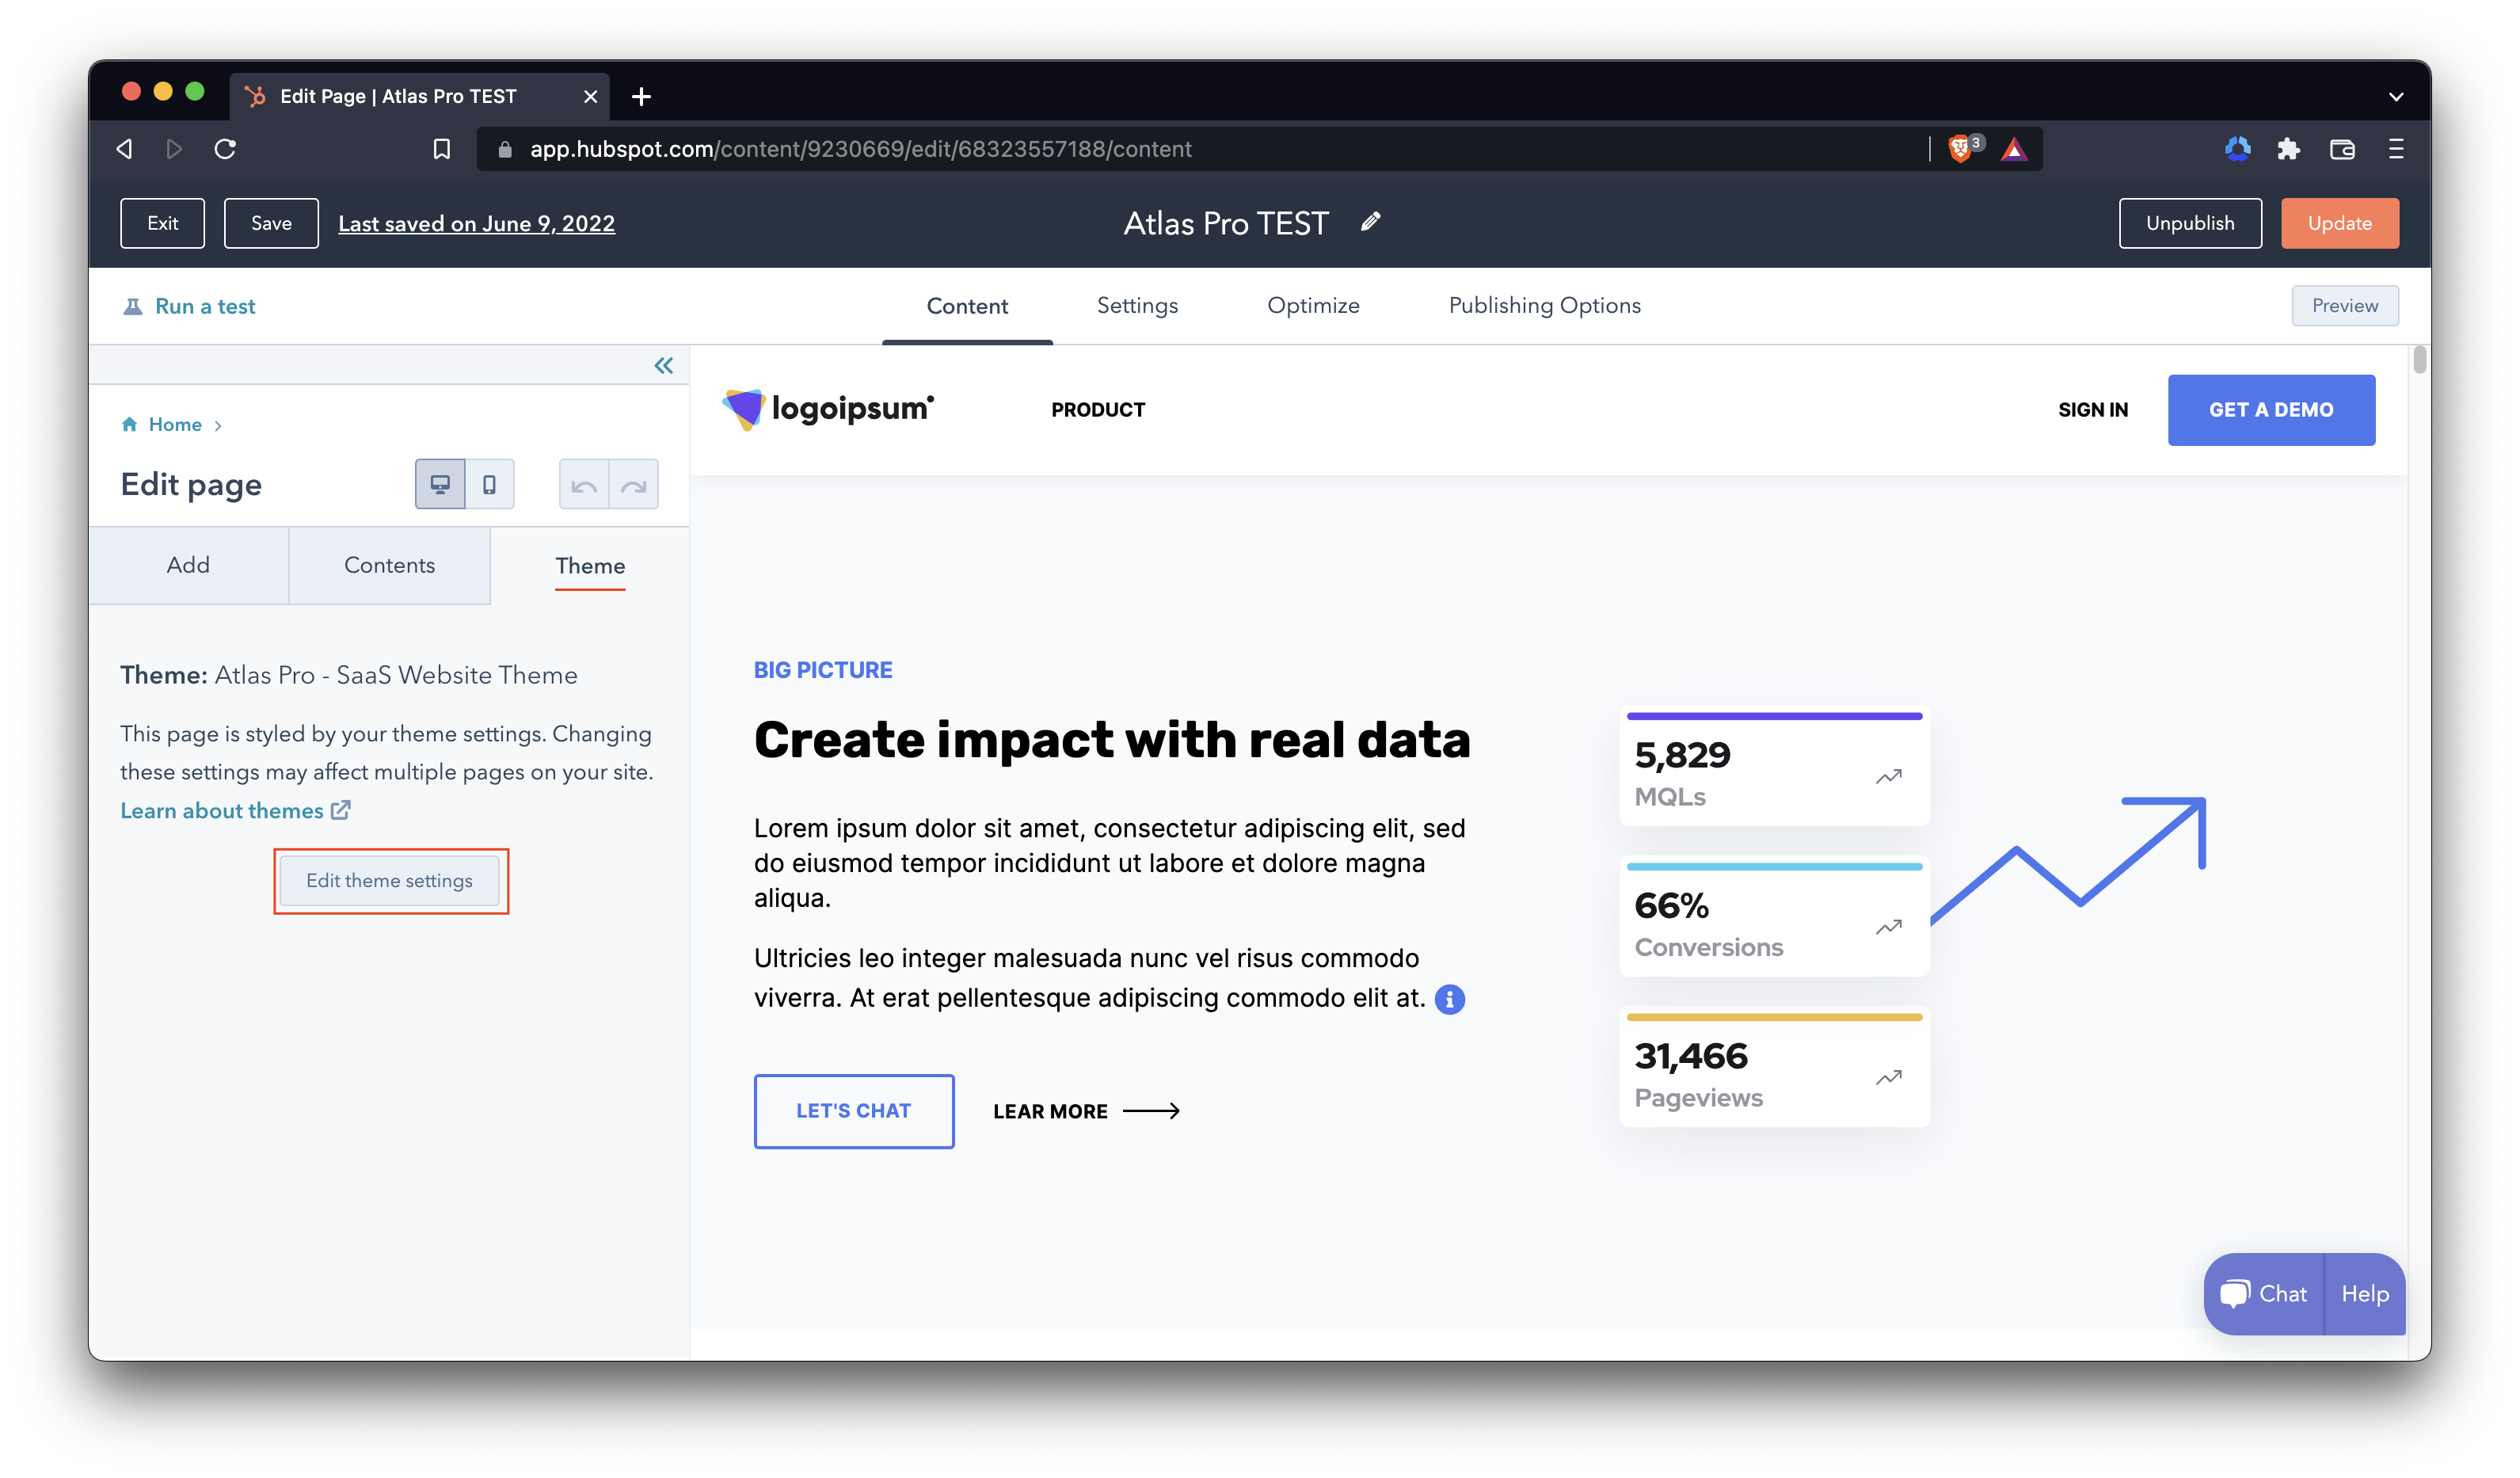
Once inside the Global theme settings, you will see that all fields are set to their default values. You will need to update this settings to mirror the Atlas Free settings (or new ones if you do not want to replicate it).
If you need to check your Atlas Free Global theme settings, you can follow this same process on a page that uses an Atlas Free template.
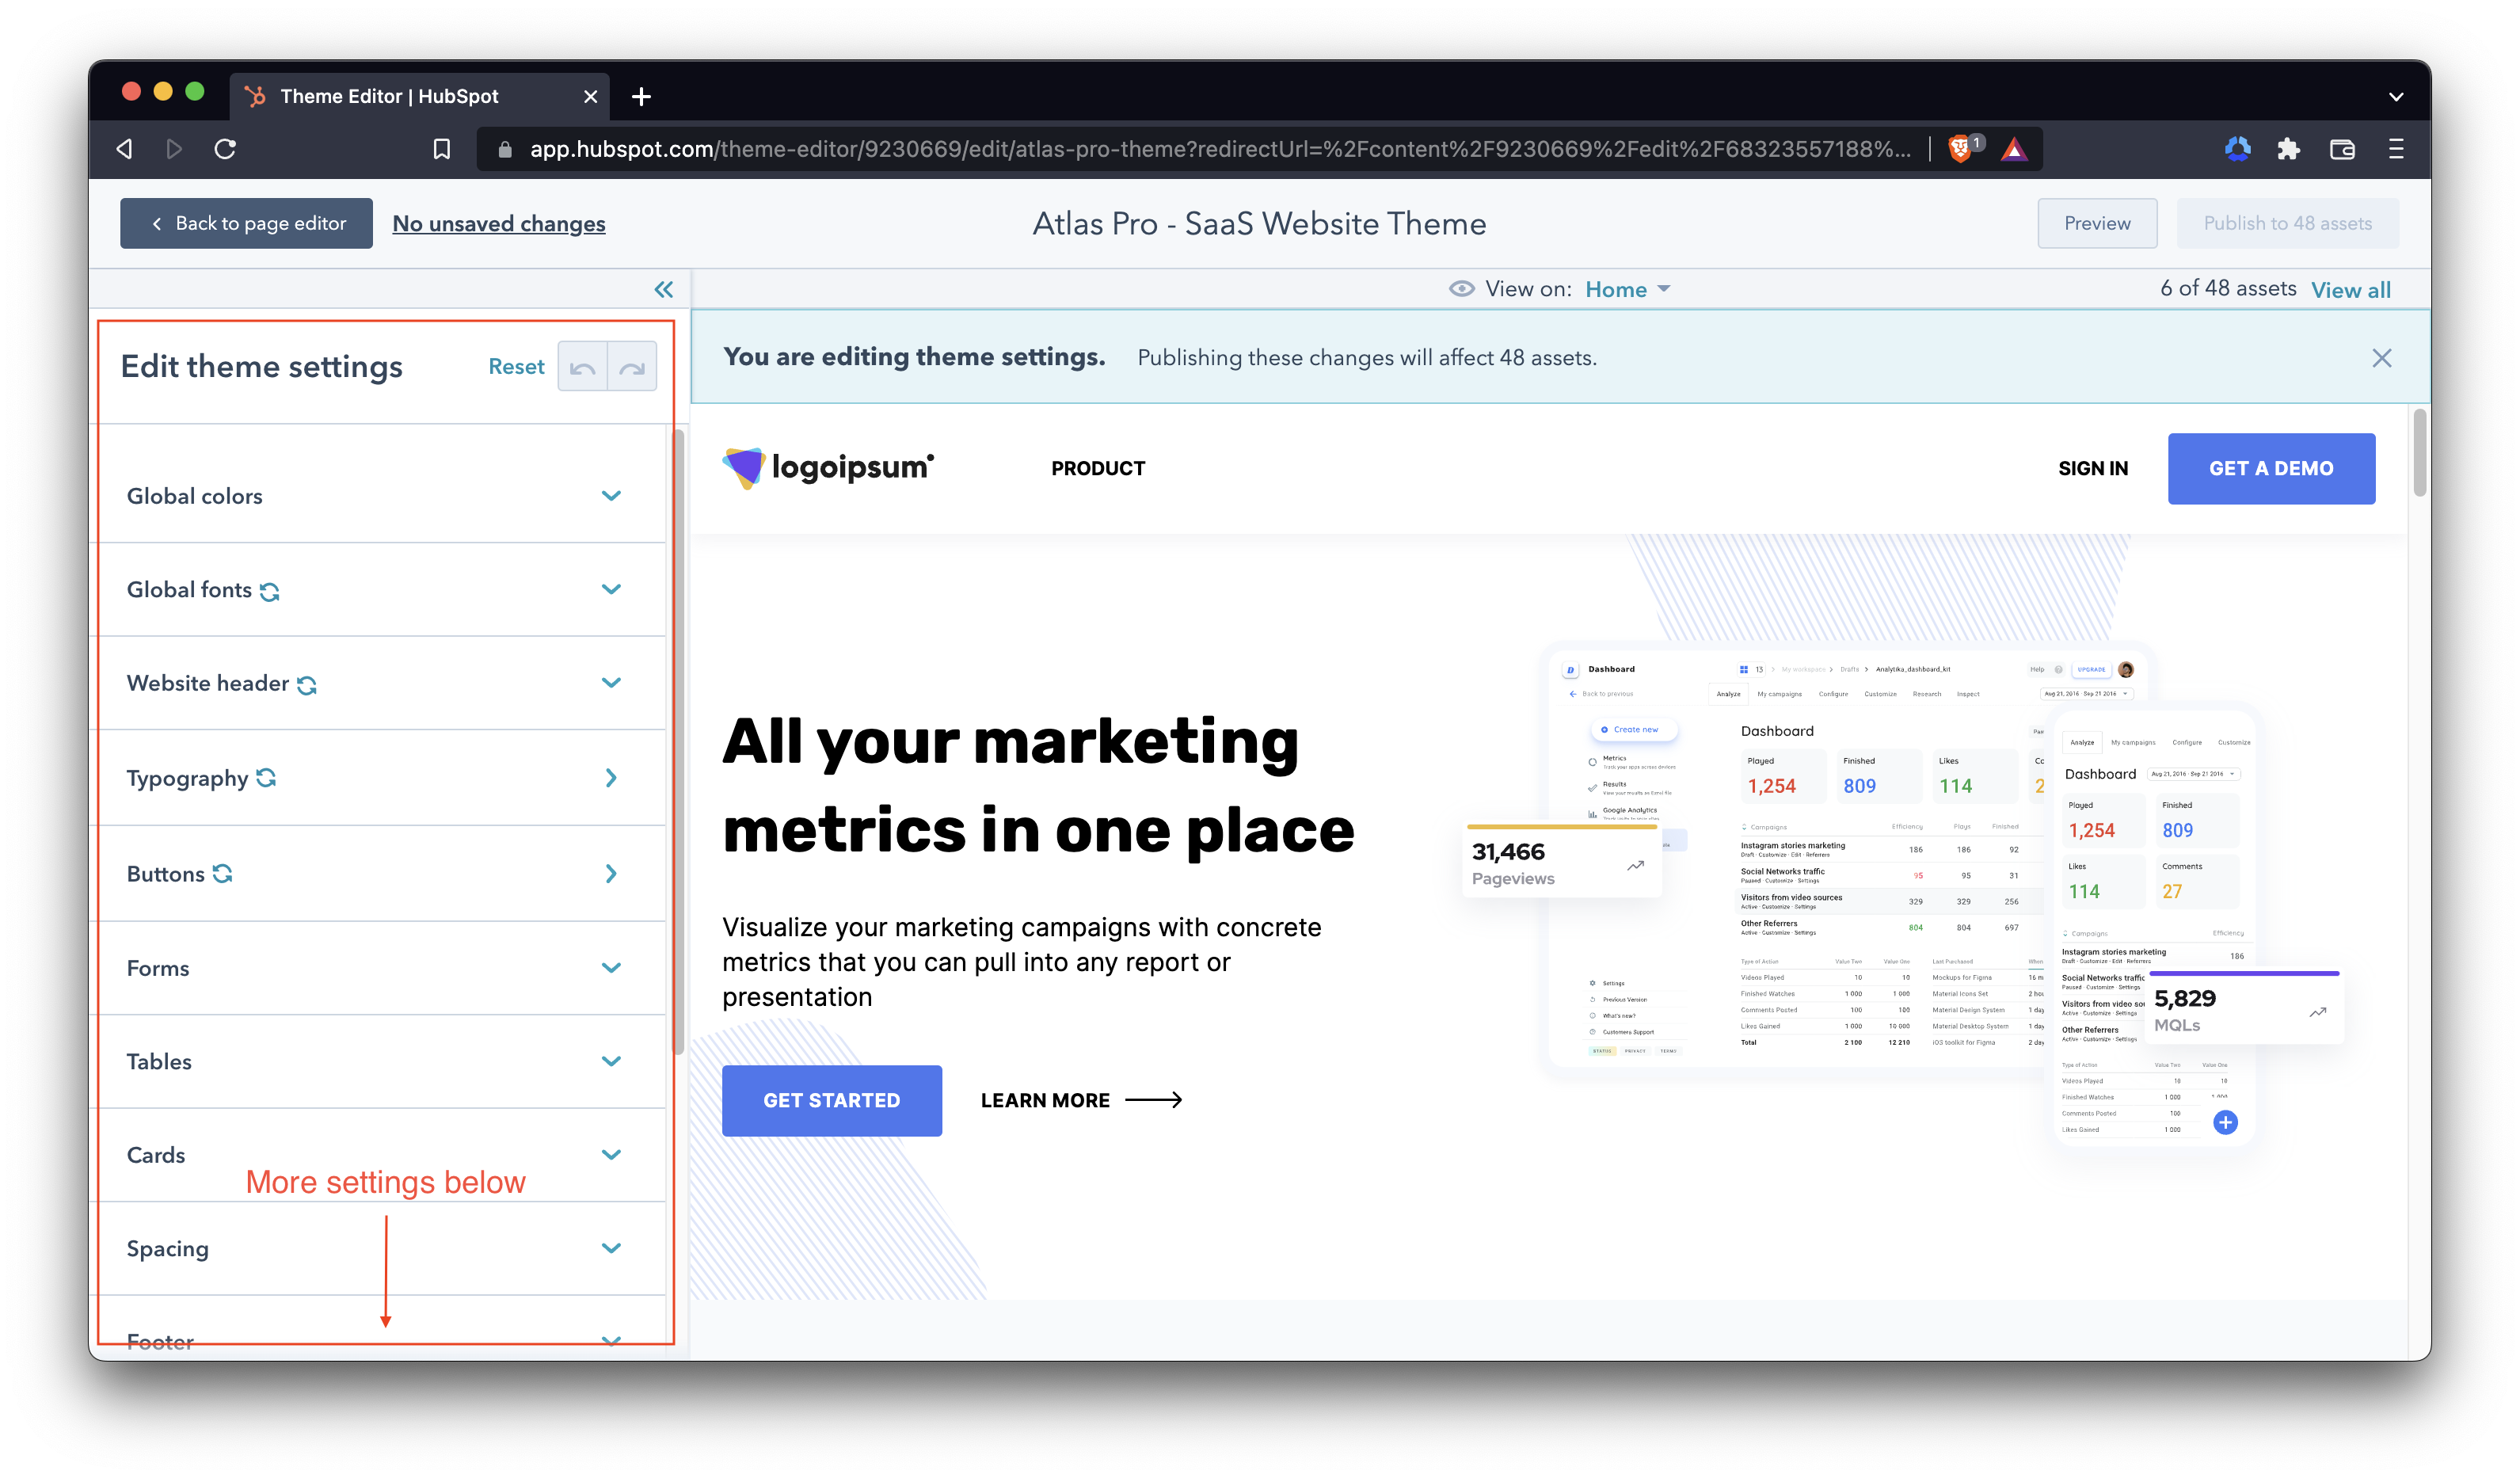
Please make sure to Save your changes (button on the lower left side) and Publish them (orange button on the top right) in order for the settings to be applied.
This concludes the Global Theme Settings reconfiguration section
Global Modules.
You can modify the Global Header and the Global Footer modules by clicking on the actual modules when editing the test page.
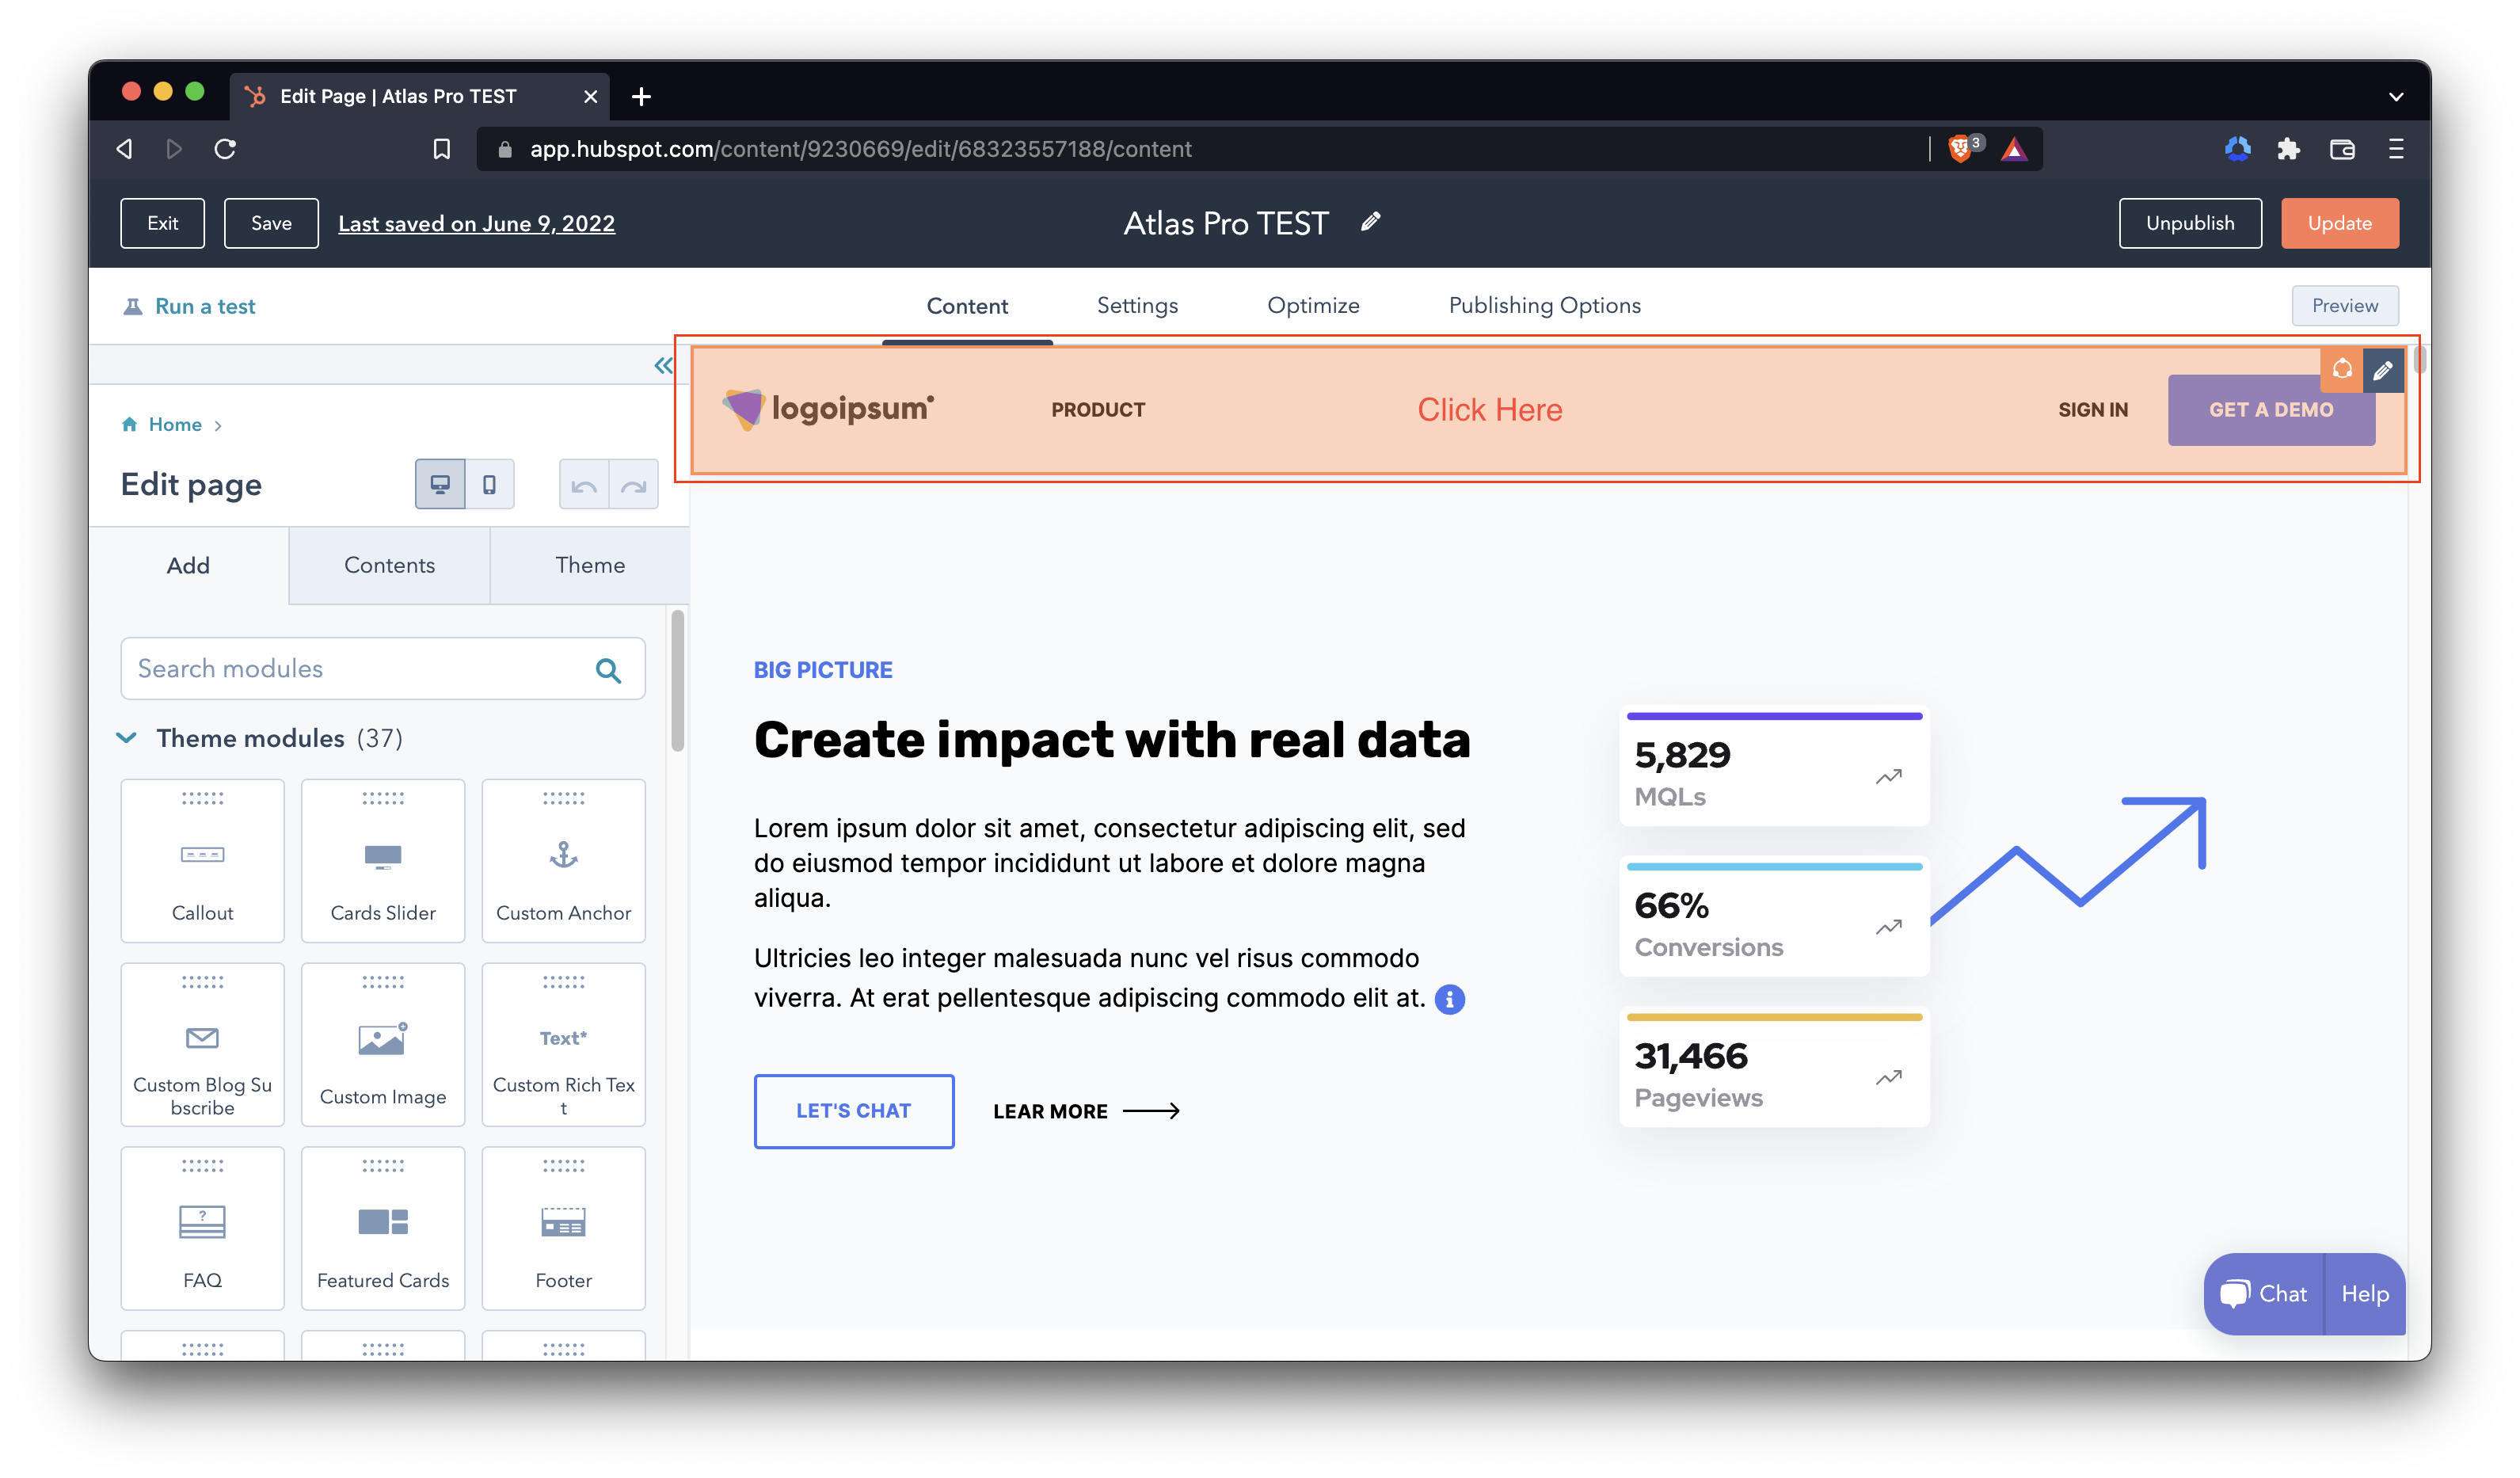
Once you do so, a warning with a message about modifying global modules will appear. You will need to click on the Edit in Global content editor button.
This will open the global module, where you can modify and update it to mirror the settings from Atlas Free. If you need to check which options are being used in the free version, you can follow this same process on a page that uses the Atlas Free template.
Please make sure to Save your changes (button on the lower left side) and Publish them (orange button on the top right) in order for the settings to be applied.
You will need to do this for the Global Navbar and the Global Footer.
This concludes the Global modules reconfiguration section.
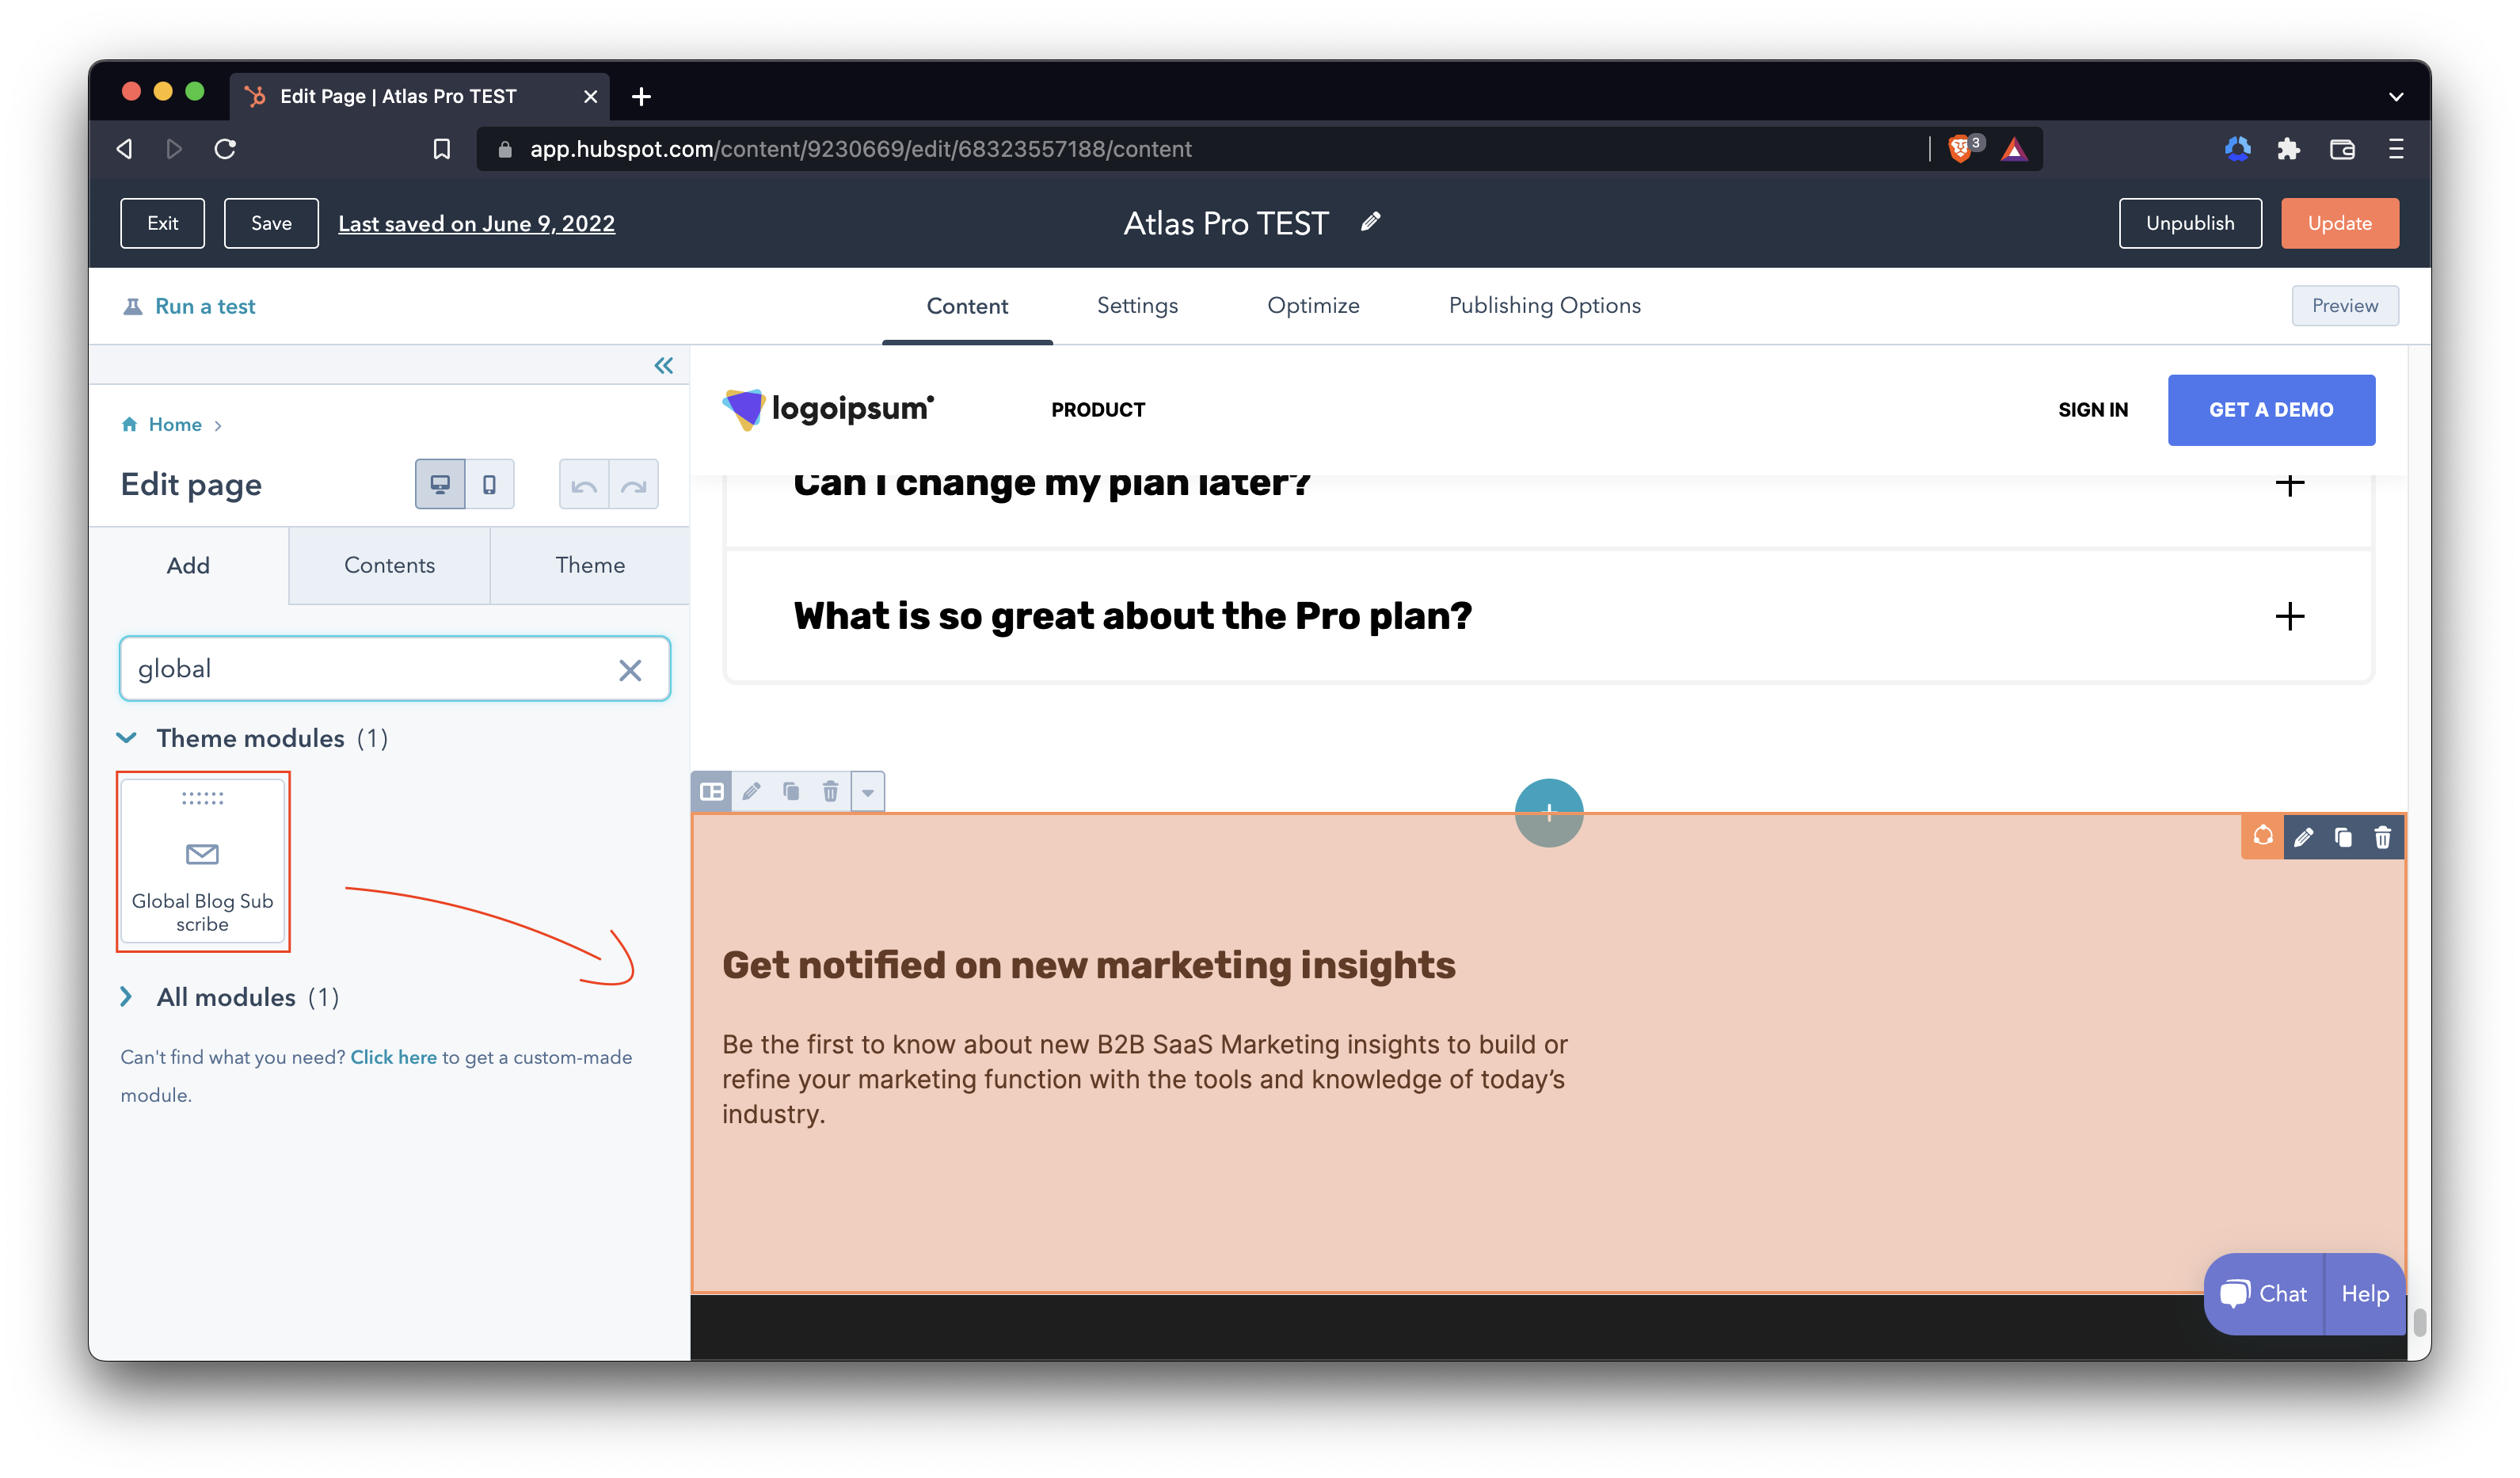
Global Blog Subscribe
For this specific module, you will need to drag and drop it on the test page we are using (this module is not inserted by default). You will need to search for Global Blog Subscribe and insert it into any part of the page (the place doesn't matter, we just want to update its settings). Once you have done so, you can click on it (same as the Global modules that we modified on the previos sections) and update it globally.
Please make sure to Save your changes (button on the lower left side) and Publish them (orange button on the top right) in order for the settings to be applied.
This concludes the Global Blog Subscribe reconfiguration section.
2. How to migrate a page over to Atlas Pro.
Once the first section of this document has been completed, migrating the pages from Atlas Free to Atlas Pro is super simple and straightforward. Please refer to the specific section on how to migrate different types of pages.
Website Pages and Landing Pages
Website and Landing Pages can be migrated by updating the template they are using. You can do this by accessing the the Settings Tab when editing the page and searching for the Template option under Advanced Settings. Click on Use a different template and select one of the templates from Atlas Pro.
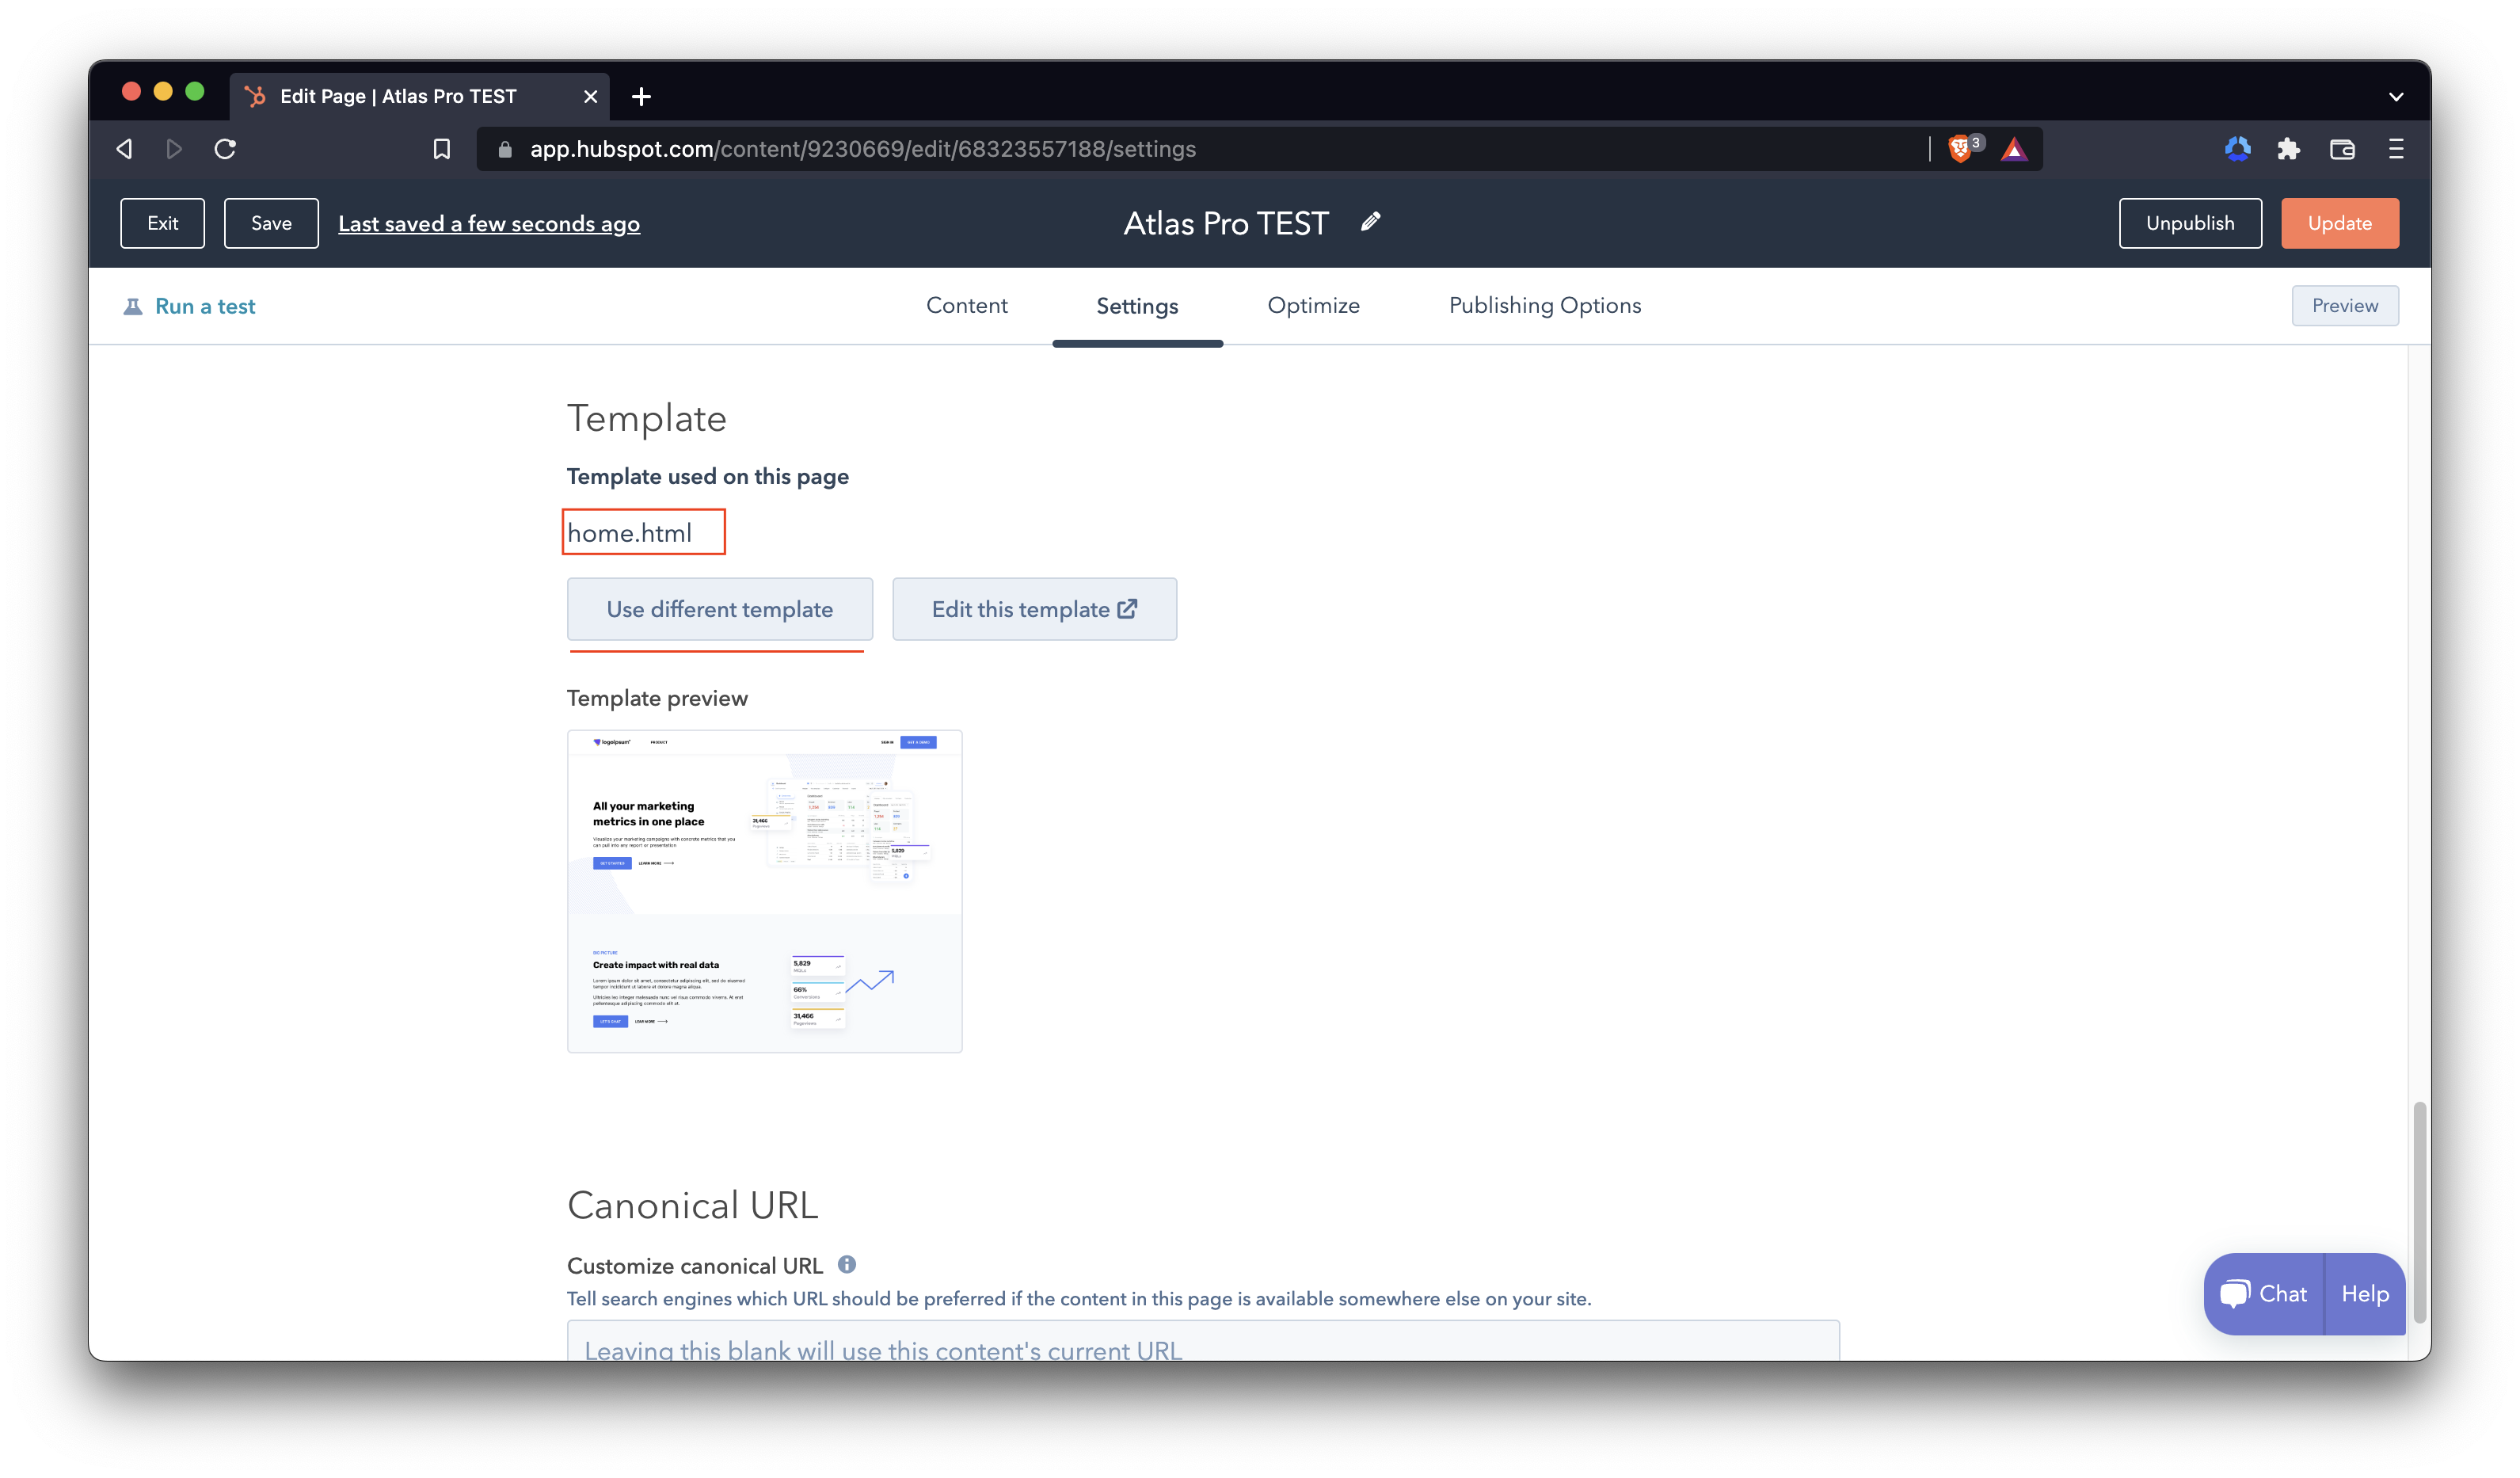
We advice you to use the same template you were using in Atlas Free. For example, if you were using the Home template in Atlas Free, you should select the Home template in Atlas Pro.
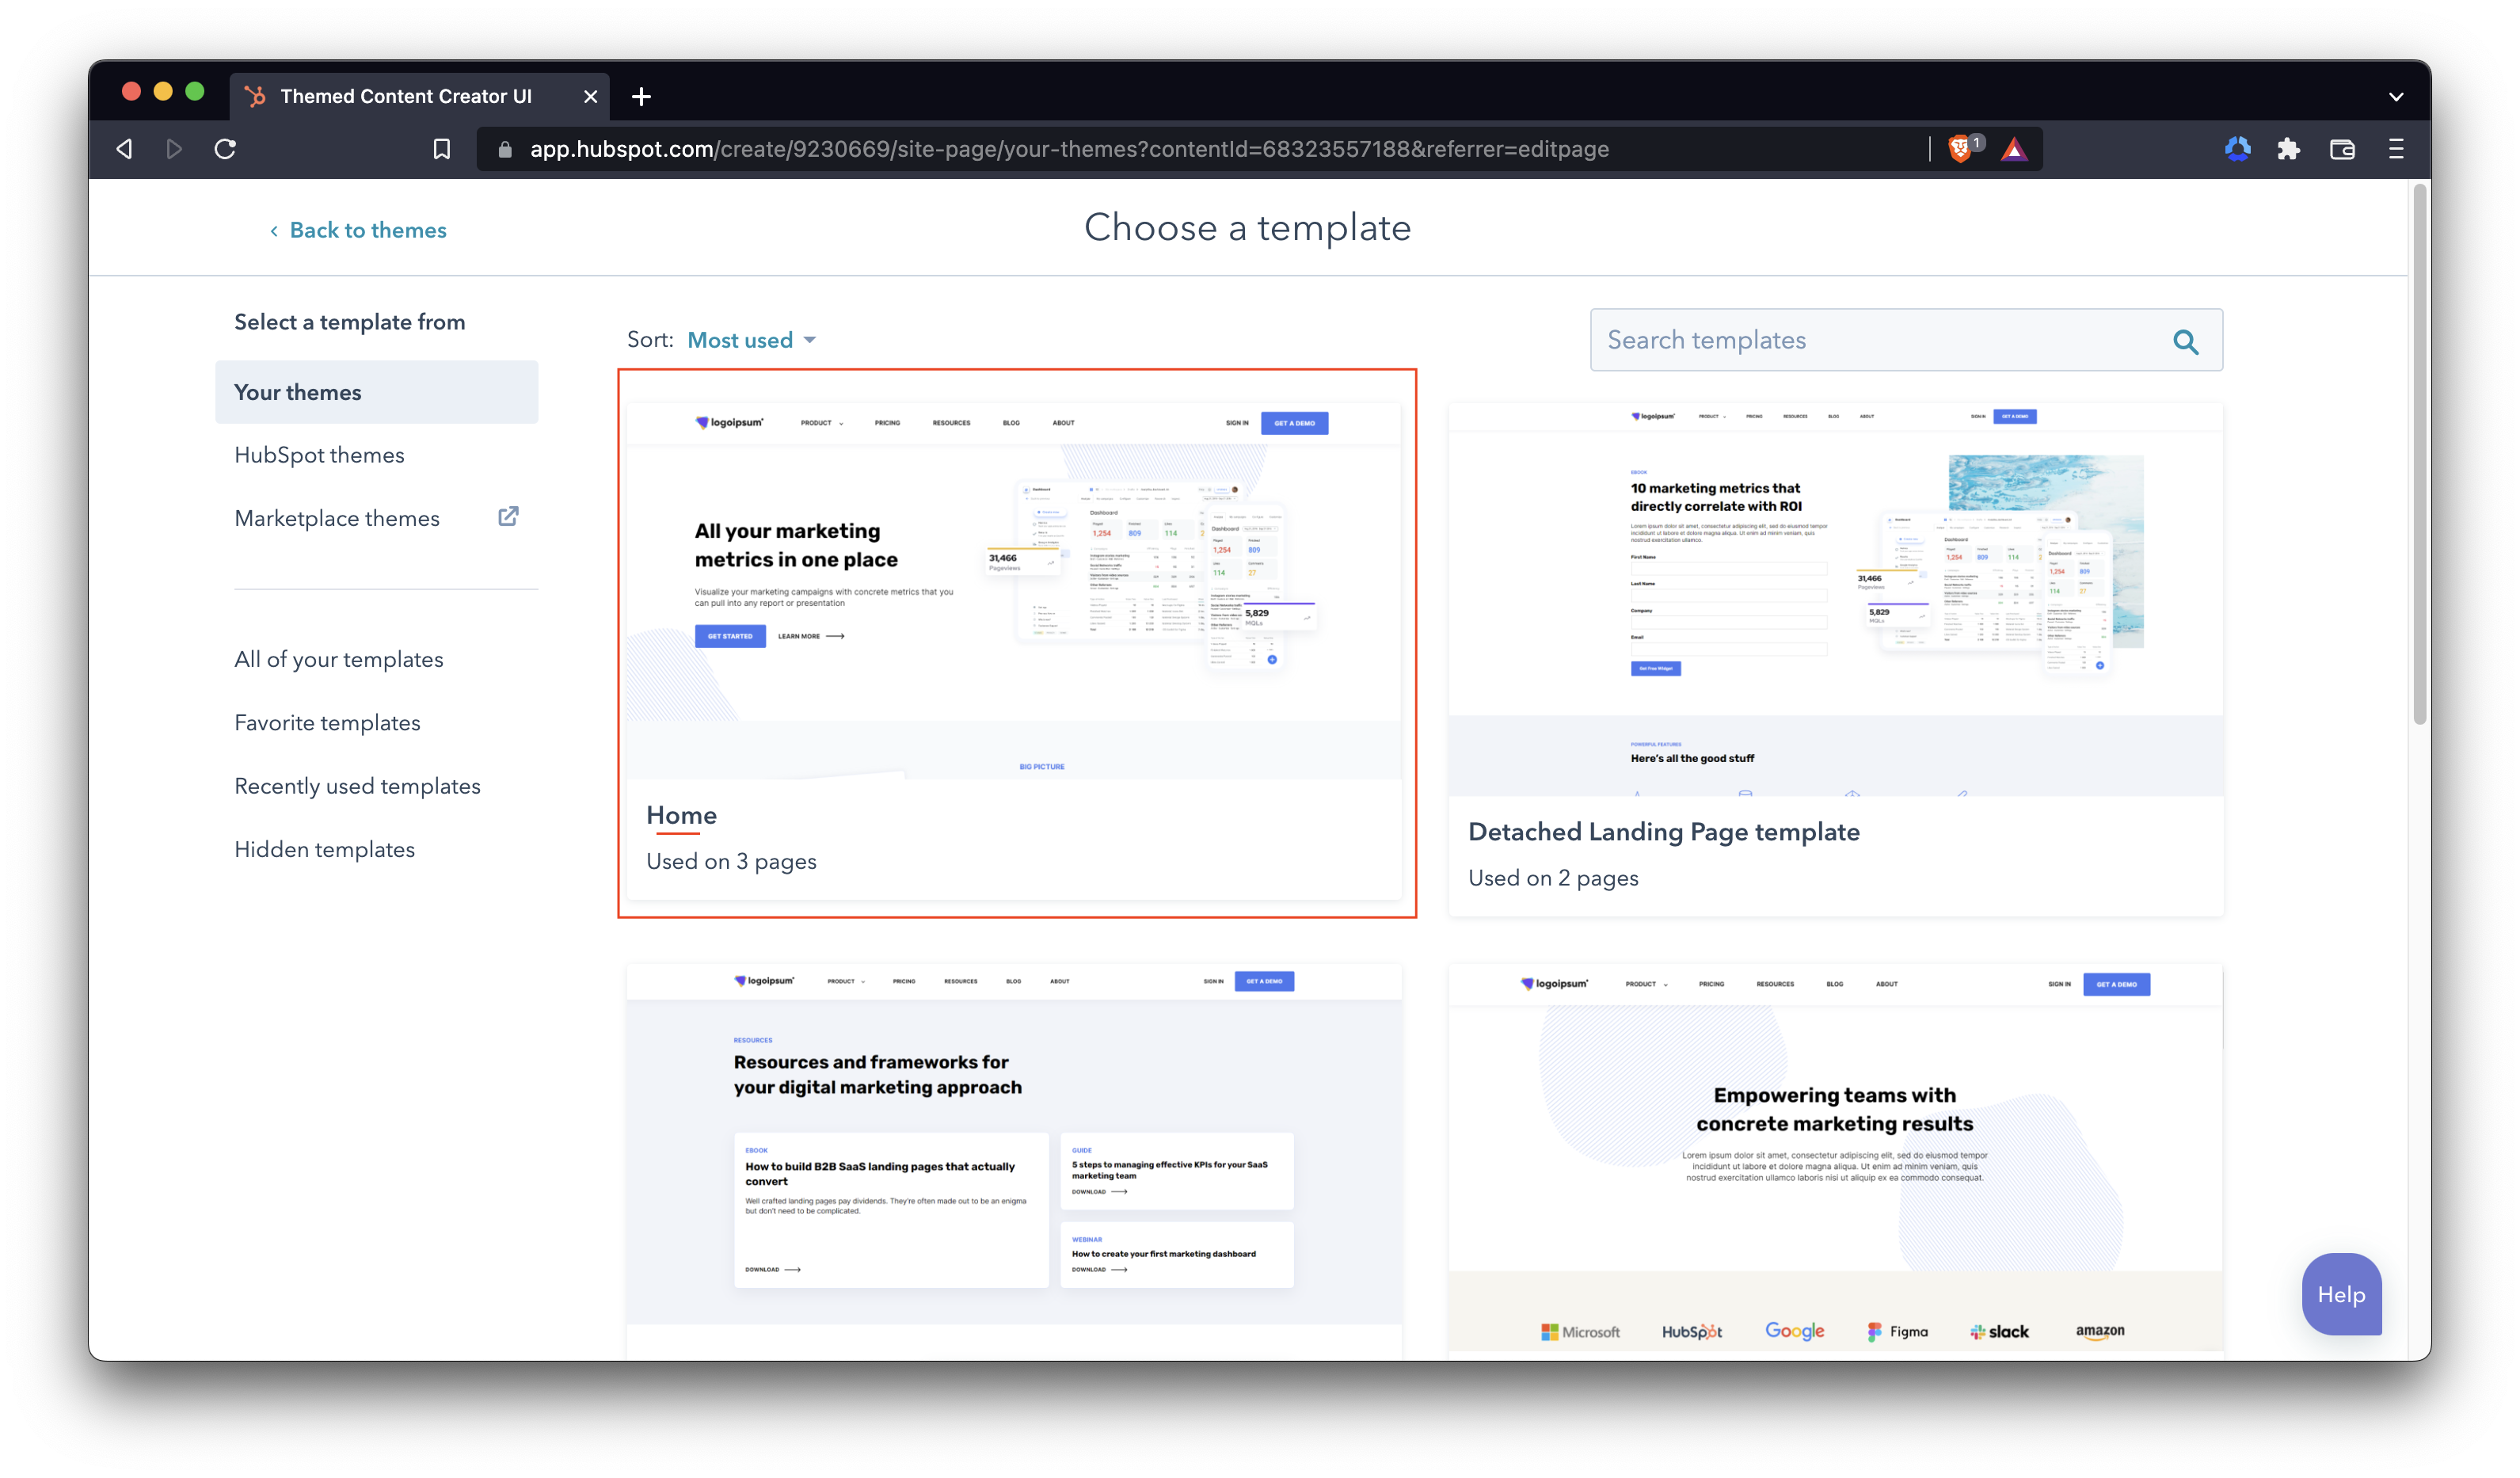
The preview view will show you the updated version of the page (using an Atlas Pro template). Click on Use Template.
This concludes the Website Pages and Landing Pages migration section.
Blog Pages
Blog pages use 2 different templates. Please refer to the specific section on how to migrate them.
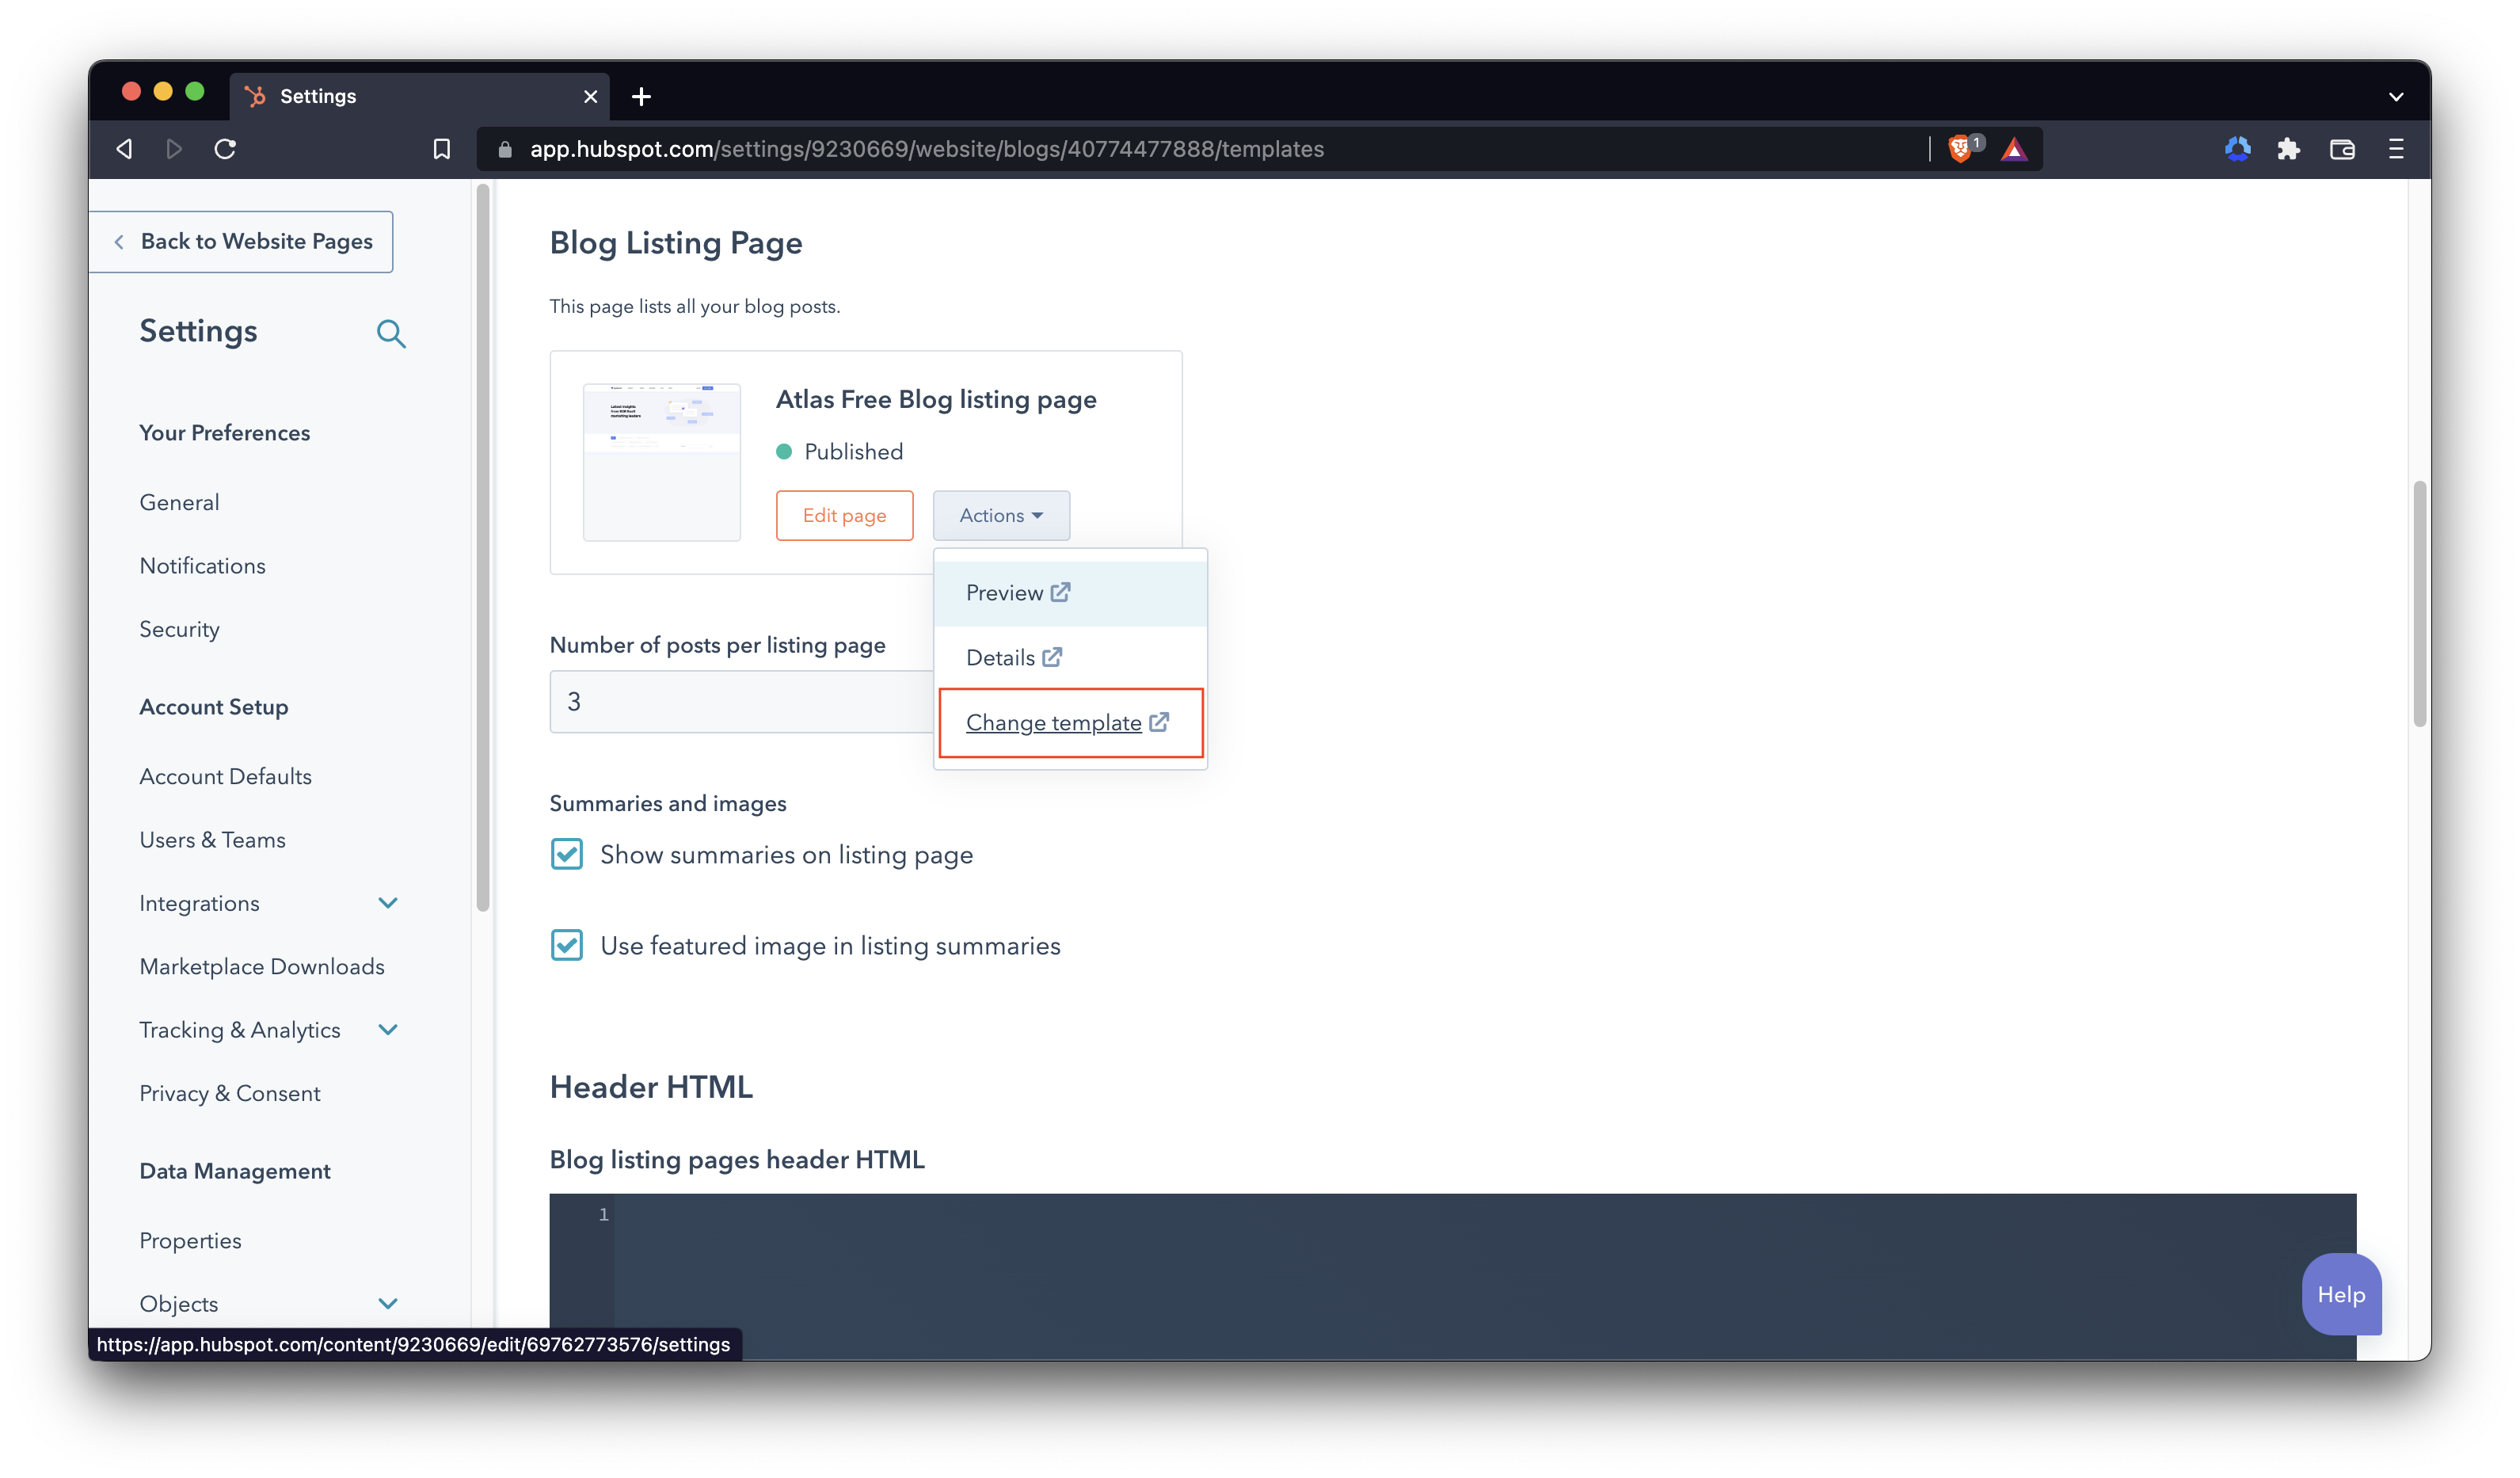
Blog Listing Template
The Blog Listing Template can be updated in Hubspot Settings (gear icon at the top right) => Website => Blog. Make sure you are selecting the correct blog at the top of the page (in the "Current View" selector) and then go to the Templates tab. Go to Actions => Change Template under Blog Listing Template. This will open the listing page (similar to the Website and Landing Pages section on this article) and make sure to select the Blog Listing template from Atlas Pro.
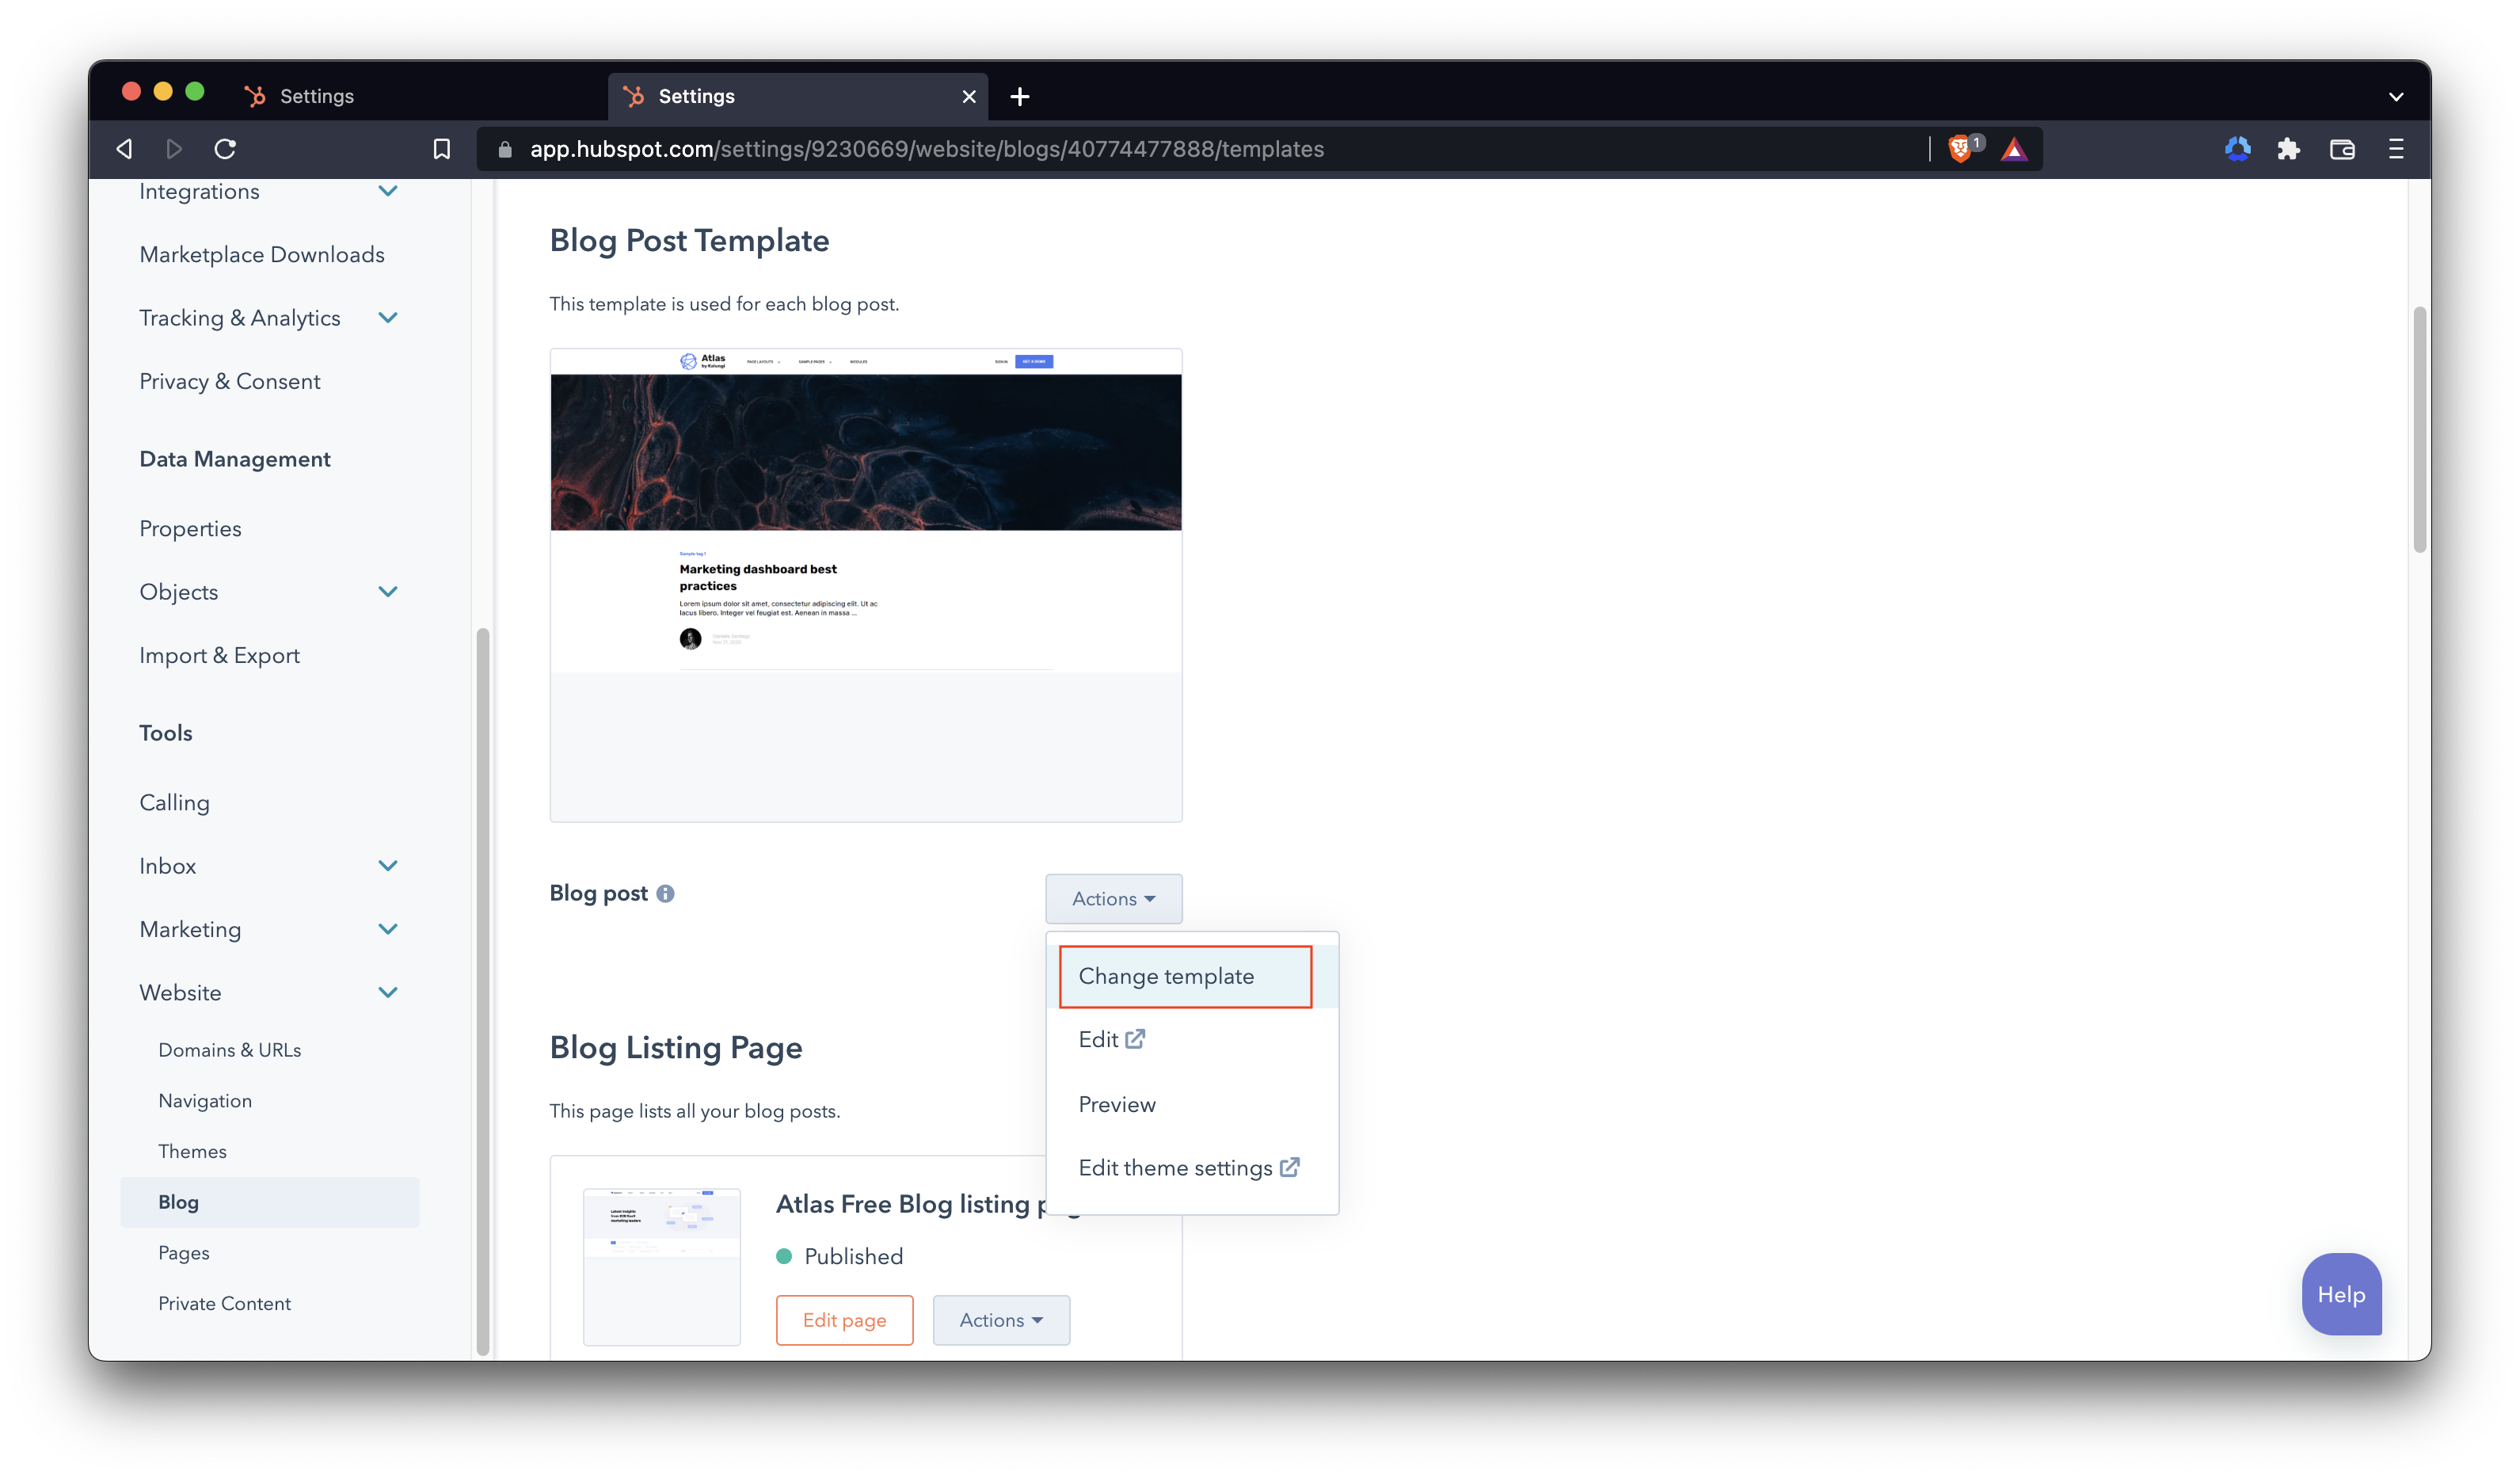
Blog Post Template
The Blog Post Template can be updated in Hubspot Settings (gear icon at the top right) => Website => Blog. Make sure you are selecting the correct blog at the top of the page (in the Current View selector) and then go to the Templates tab. Go to Actions => Change Template under Blog Post Template and make sure to select the Blog Post template from Atlas Pro.